
Connect QuickBooks to Zenzap
Connect your QuickBooks account to Zenzap to receive real-time notifications about payments, invoices, and expenses in dedicated chats.
On Mobile (iOS & Android)
Follow these steps to set up QuickBooks and configure your notifications in Zenzap.
Initial Setup and Authorization
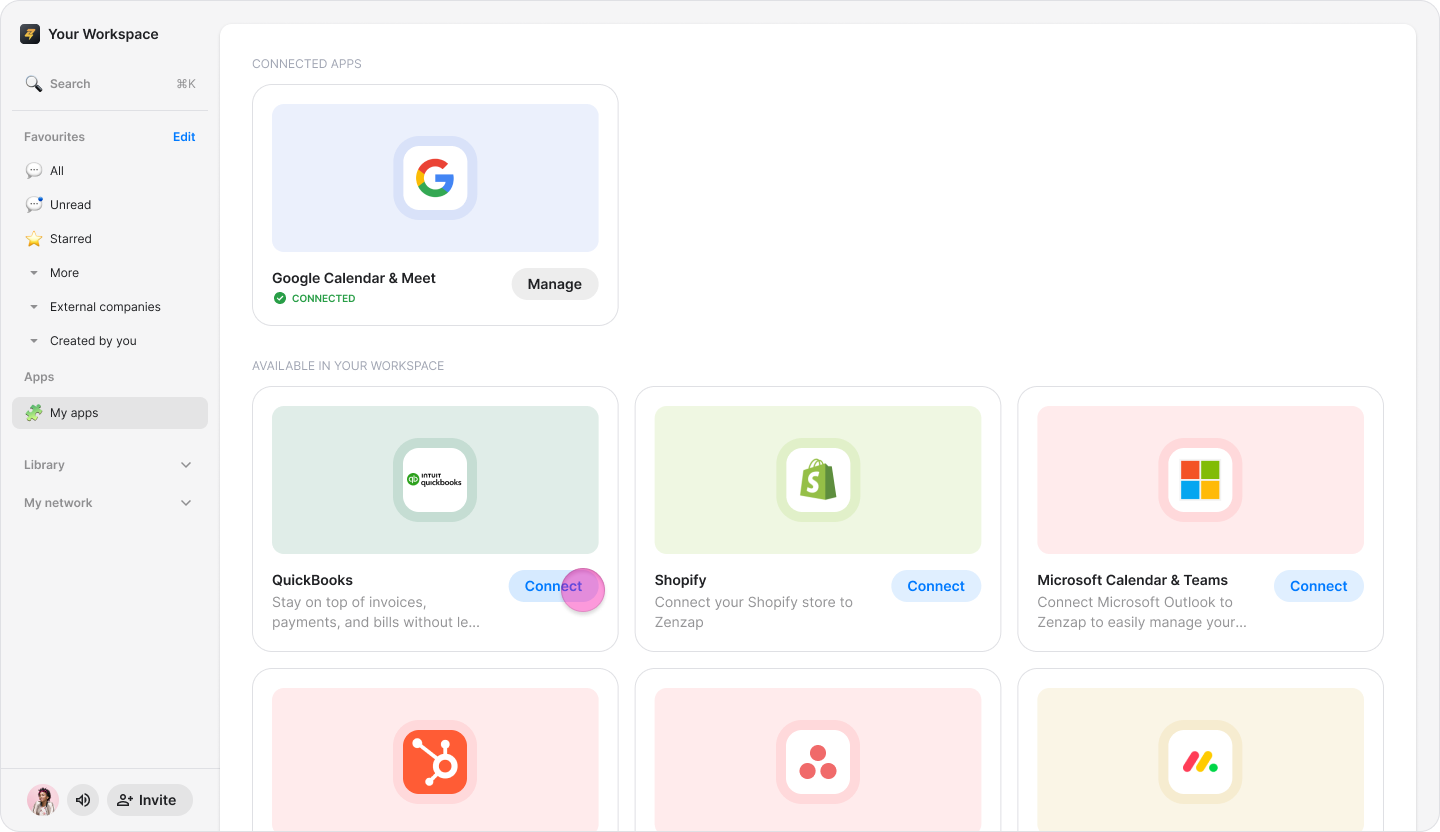
In Zenzap, go to "My apps".
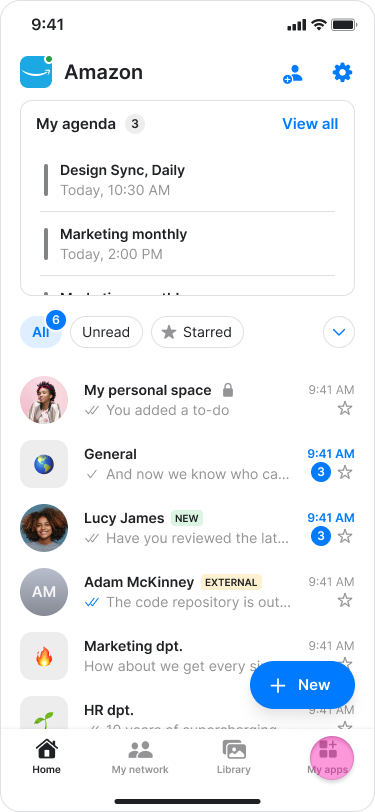
Find "QuickBooks" and tap "Connect".

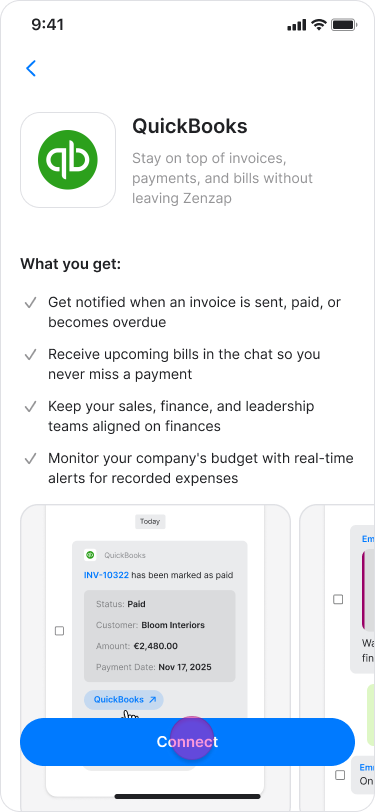
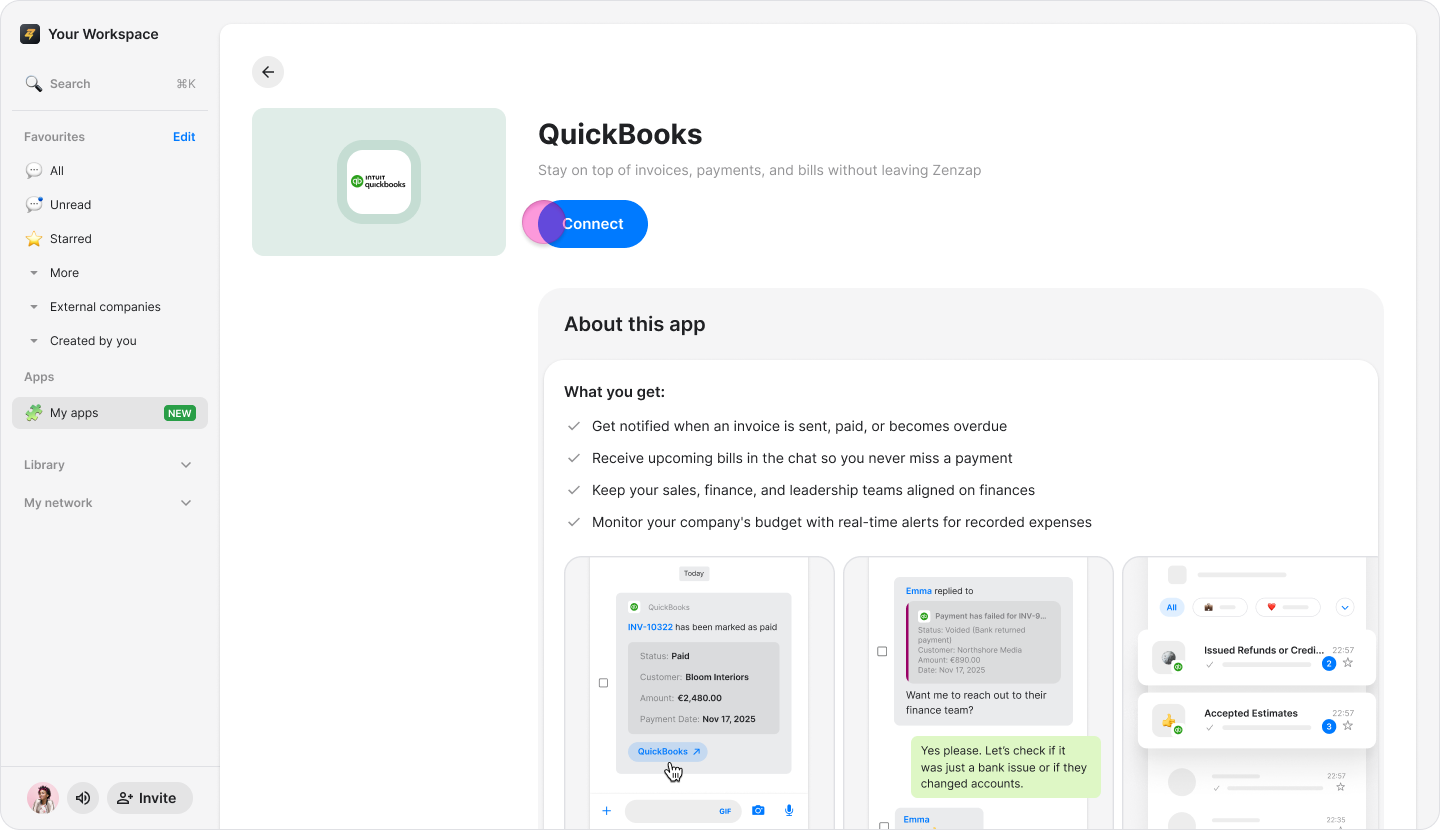
On the QuickBooks page, tap "Connect" again.
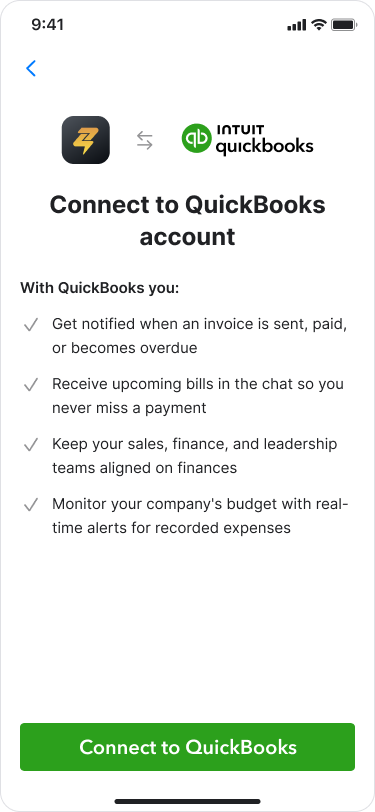
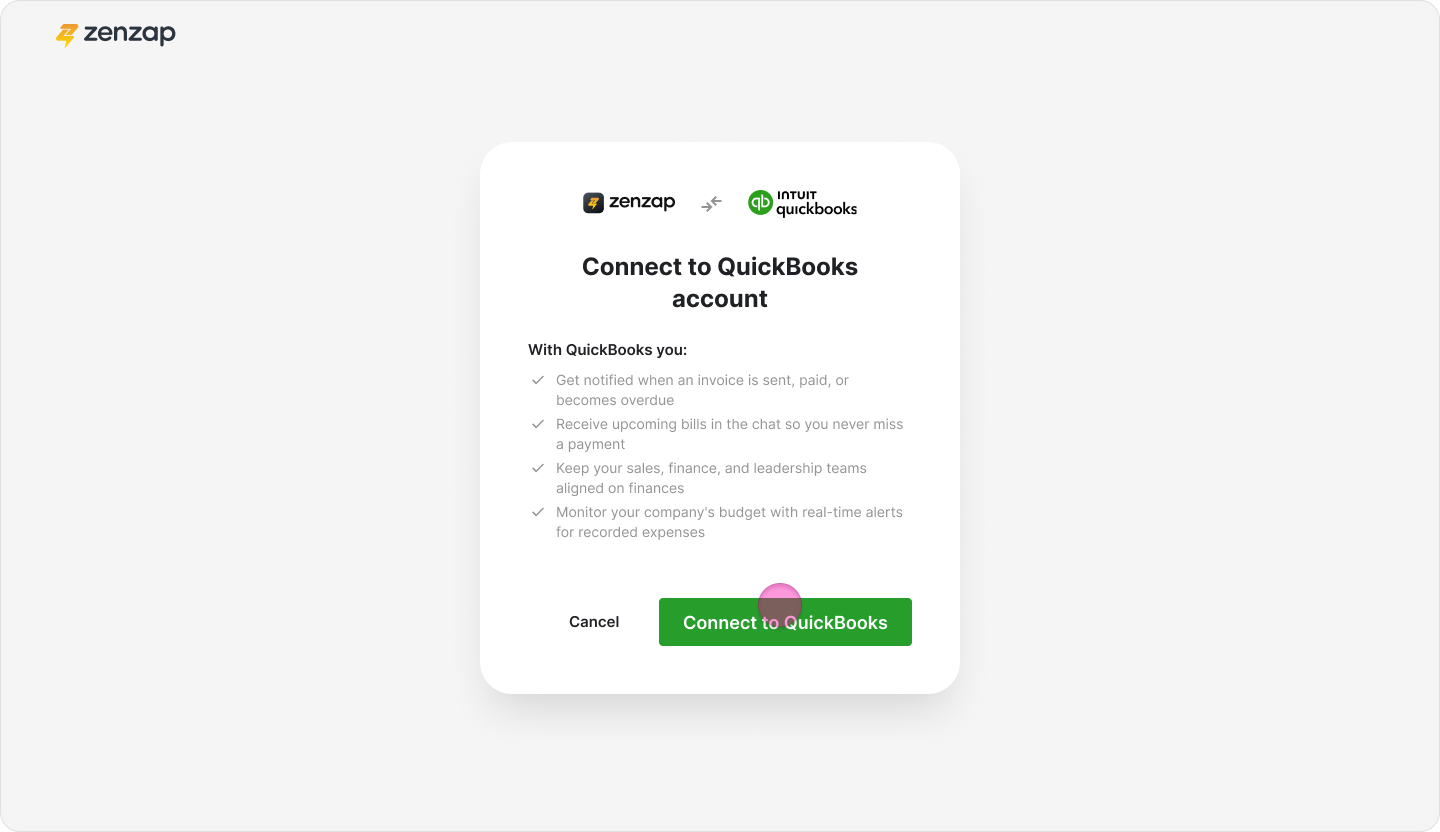
On the "Connect to QuickBooks account" page, tap "Connect to QuickBooks”.
Sign in to your QuickBooks account.
Select "Connect" to authorize the connection between Zenzap and QuickBooks.
Configure Notifications
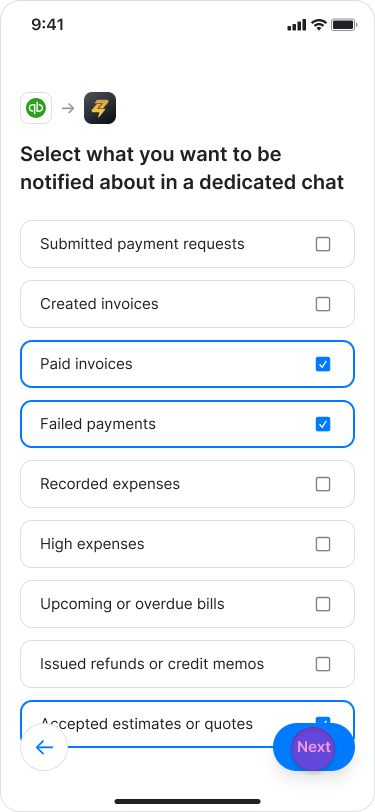
Once you are redirected back to Zenzap, choose which notifications you want to receive in dedicated Zenzap chats by checking the boxes:
Submitted payment requests
Created invoices
Paid invoices
Recorded expenses
High expenses
Upcoming or overdue bills
Issued refunds or credit memos
Accepted estimates or quotes
Tap "Next"
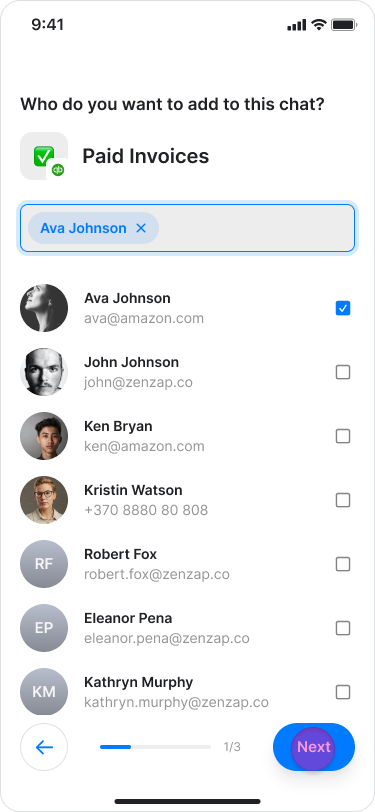
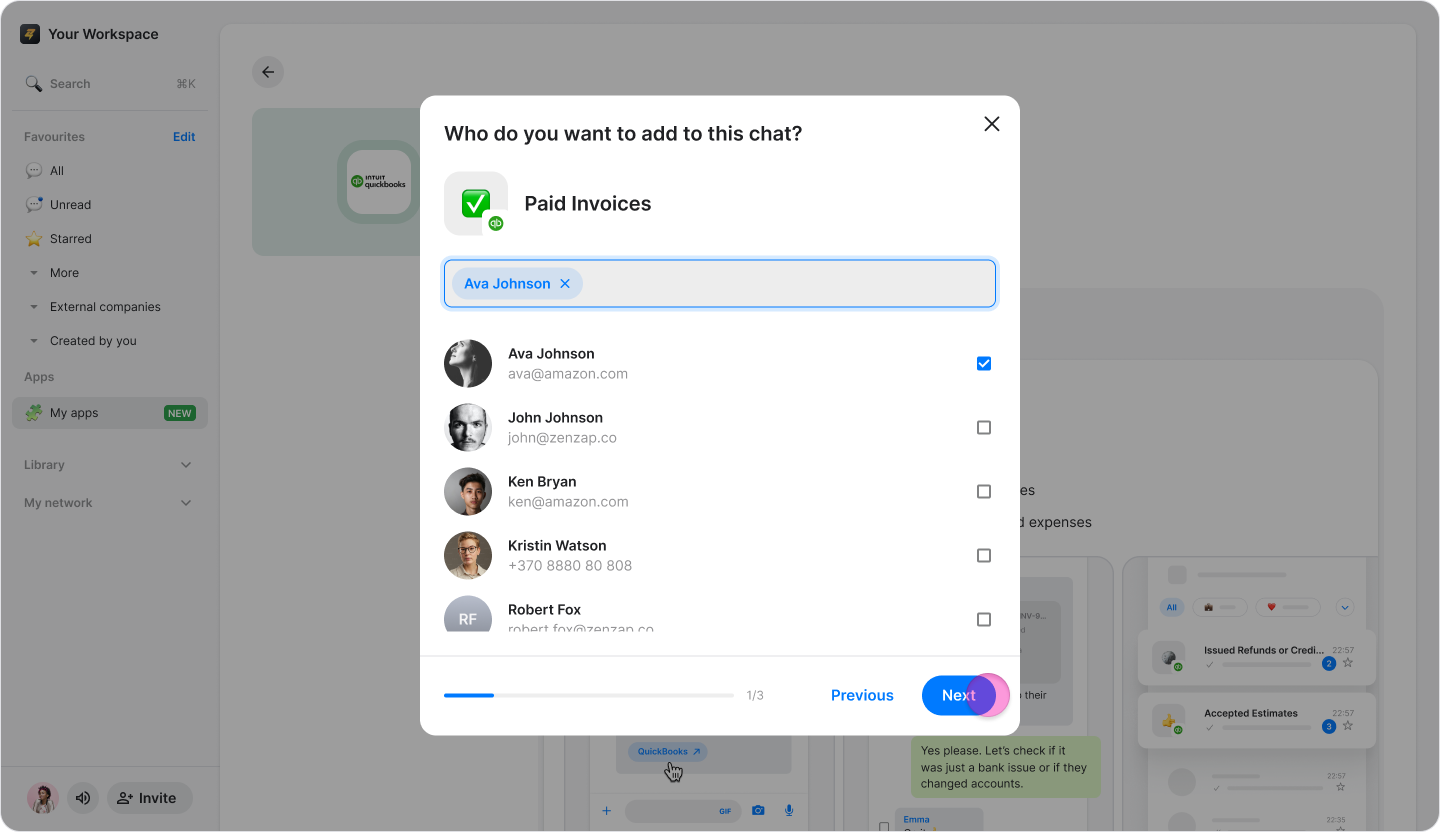
Select the people you want to add to each notification topic.
Tap "Next" to save your selections (or "Skip" to do this later).
Tap "Done" to complete the setup.

On Desktop (Windows, macOS & Web App)
Follow these steps to set up the QuickBooks and configure your notifications in Zenzap.
Initial Setup and Authorization
In Zenzap, click "My apps" in the side menu.
Find "QuickBooks" and click "Connect".
On the QuickBooks page, tap "Connect" again.
On the "Connect to QuickBooks account" page, click "Connect to QuickBooks”.
Sign in to your QuickBooks account.
Select "Connect" to authorize the connection between Zenzap and QuickBooks.
Configure Notifications
Once you are redirected back to Zenzap, choose which notifications you want to receive in dedicated Zenzap chats by checking the boxes:
Submitted payment requests
Created invoices
Paid invoices
Recorded expenses
High expenses
Upcoming or overdue bills
Issued refunds or credit memos
Accepted estimates or quotes
Click "Next"
Select the people you want to add to each notification topic.
Click "Next" to save your selections (or "Skip" to do this later).
Click "Done" to complete the setup.
